 Create Invoice
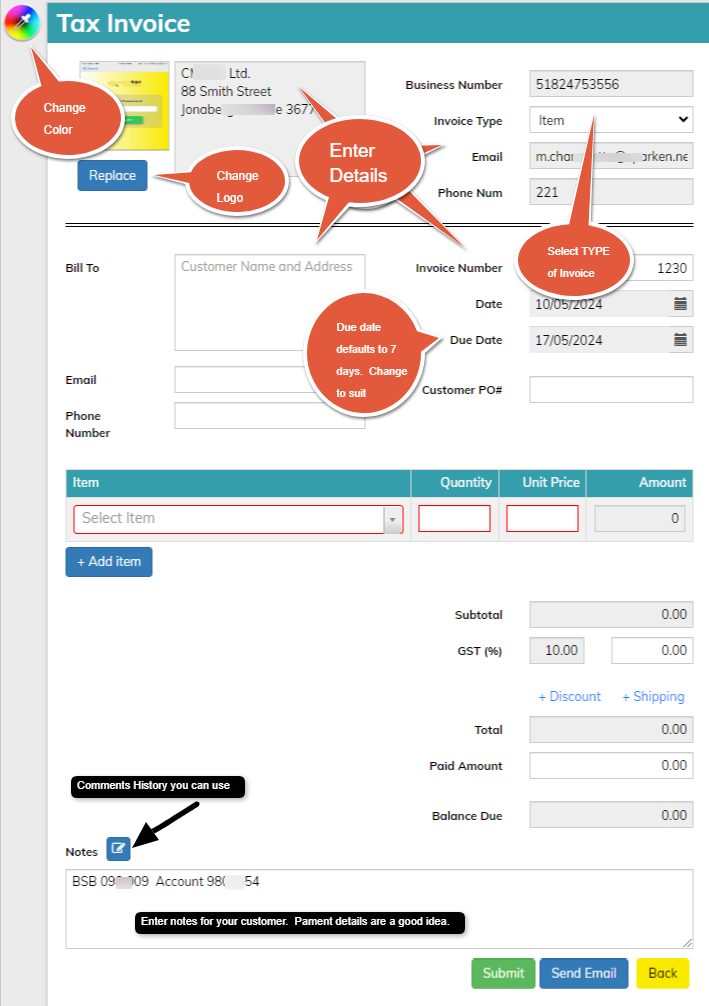
Creating an Invoice is simple and can either by done on this system or via the App (which you should have downloaded by now).

Functions of the Invoice:
Choose the colour of your Invoice
Import your Logo or Corporate Image or replace existing one
Your Address and Business Number should automatically populate, if they are not there you'll need to head back to the home page and use the EDIT ICON available with your LOGO on the HOME SCREEN ... EDIT BUSINESS DETAILS
TRICKY BIT - make sure you choose the TYPE of Invoice, either an ITEM INVOICE or a SERVICE INVOICE.
Follow the prompts to complete the rest of YOUR INVOICE.
Note the DUE DATE. This is defaulted to 7 DAYS. Change to suit your business.
And whatever notes you use, they will be saved for future Invoice. You can change the notes on any Invoice. You can retrieve past notes you have used for current use.
Once completed you can SUBMIT the quote which means it's being recorded or you can SEND EMAIL the Invoice straight to your customer as soon as the work is finished. This can also be done via the eCashbooks App when you are working away from your desk.